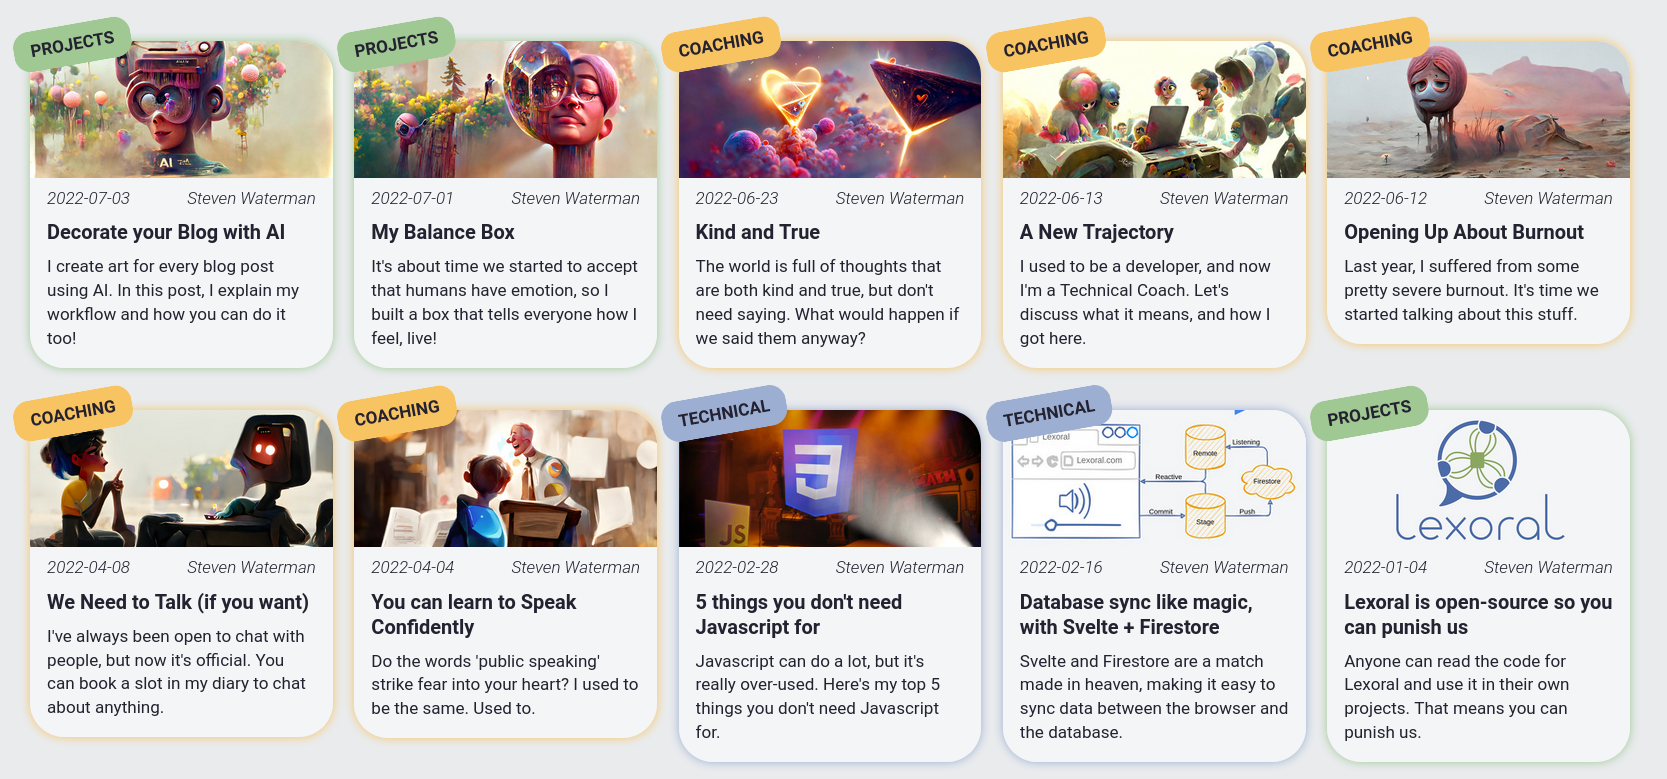
Decorate your Blog with AI
A few months ago, I saw OpenAI's announcement of their next-gen image synthesis model, DALL·E 2. I started looking around to see what the open-source state-of-the-art looked like. While it's not as good, it still is very good. I discovered Disco Diffusion, integrated into that community, and even created my own fork.
Since discovering AI art, I've used it to create the header image for all my blog posts. Looking at the home page, you can see when that change happened.
Tools
There are quite a few deep-learning image-generation tools available now. I'm going to focus on text-to-image, because that's what I have experience with. Likewise, this isn't a complete list at all. People are constantly creating new tools - I just discovered Latent Majesty Diffusion today.
| Name | Description | Sample (hover) |
|---|---|---|
| DALL·E 2 | Closed source, invite only (good luck), state of the art, amazing at everything but has strict content filtering. | 
|
| Midjourney | Closed source, invite only, paid-for, generally creates more artsy images with excellent detail and coherence. | 
|
| Craiyon | Formerly dalle-mini, a FOSS reimplementation of the original DALL·E. Generally great coherency, not very artsy. Low resolution, but completely free to use. | 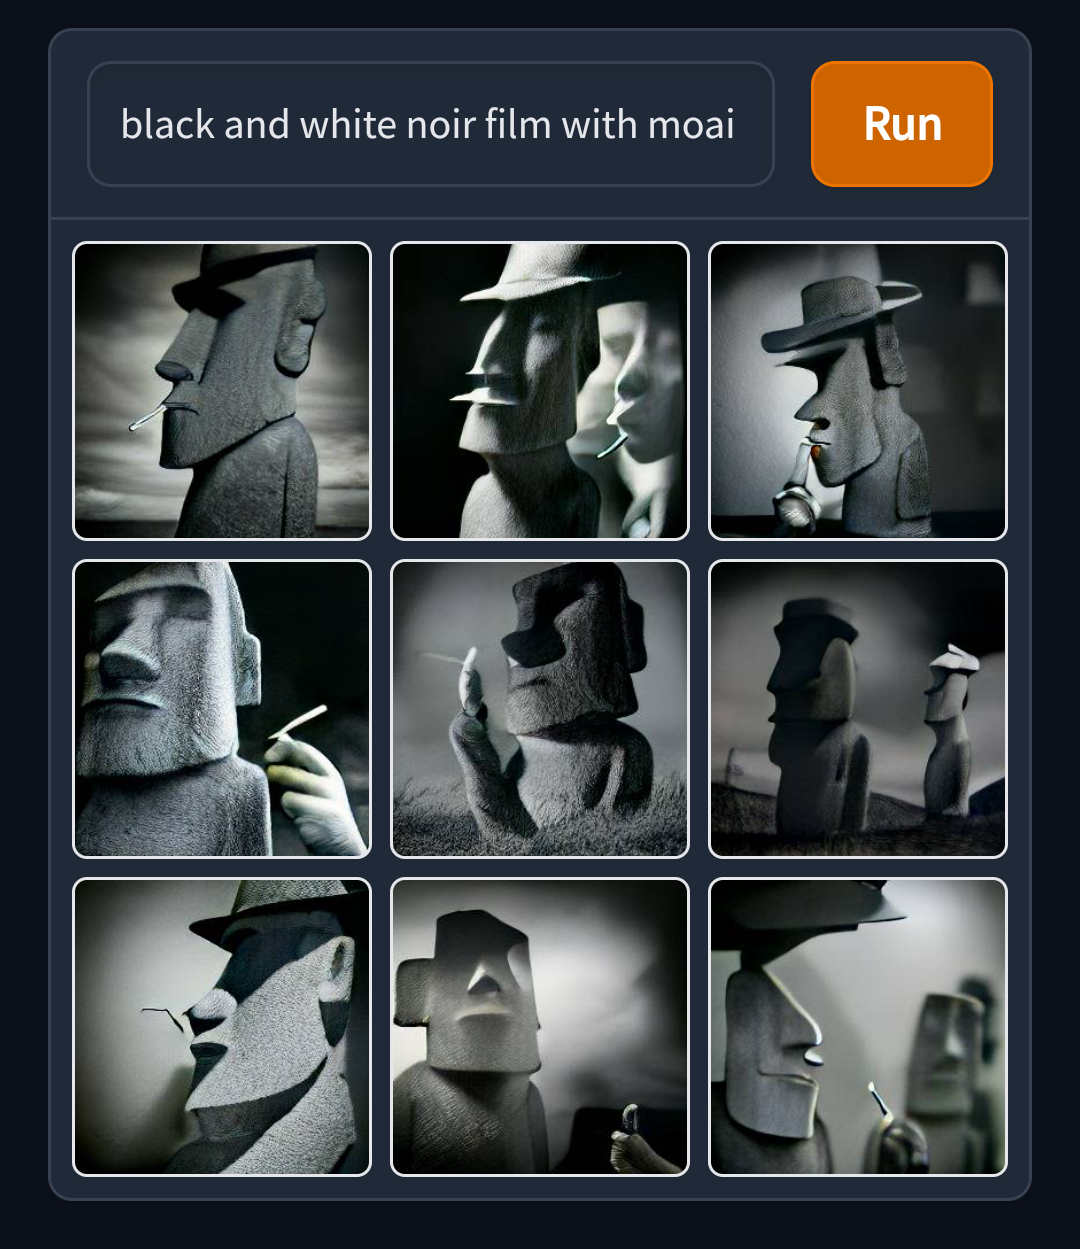
|
| Latent Diffusion | FOSS, run via Google Colab. Great coherency, especially with humans, animals, and text. Not very artsy. | 
|
| Disco Diffusion | FOSS, run via Google Colab. Very configurable, quite artsy, sometimes lacks coherency. Very slow and compute-heavy. I use a custom fork of this. | 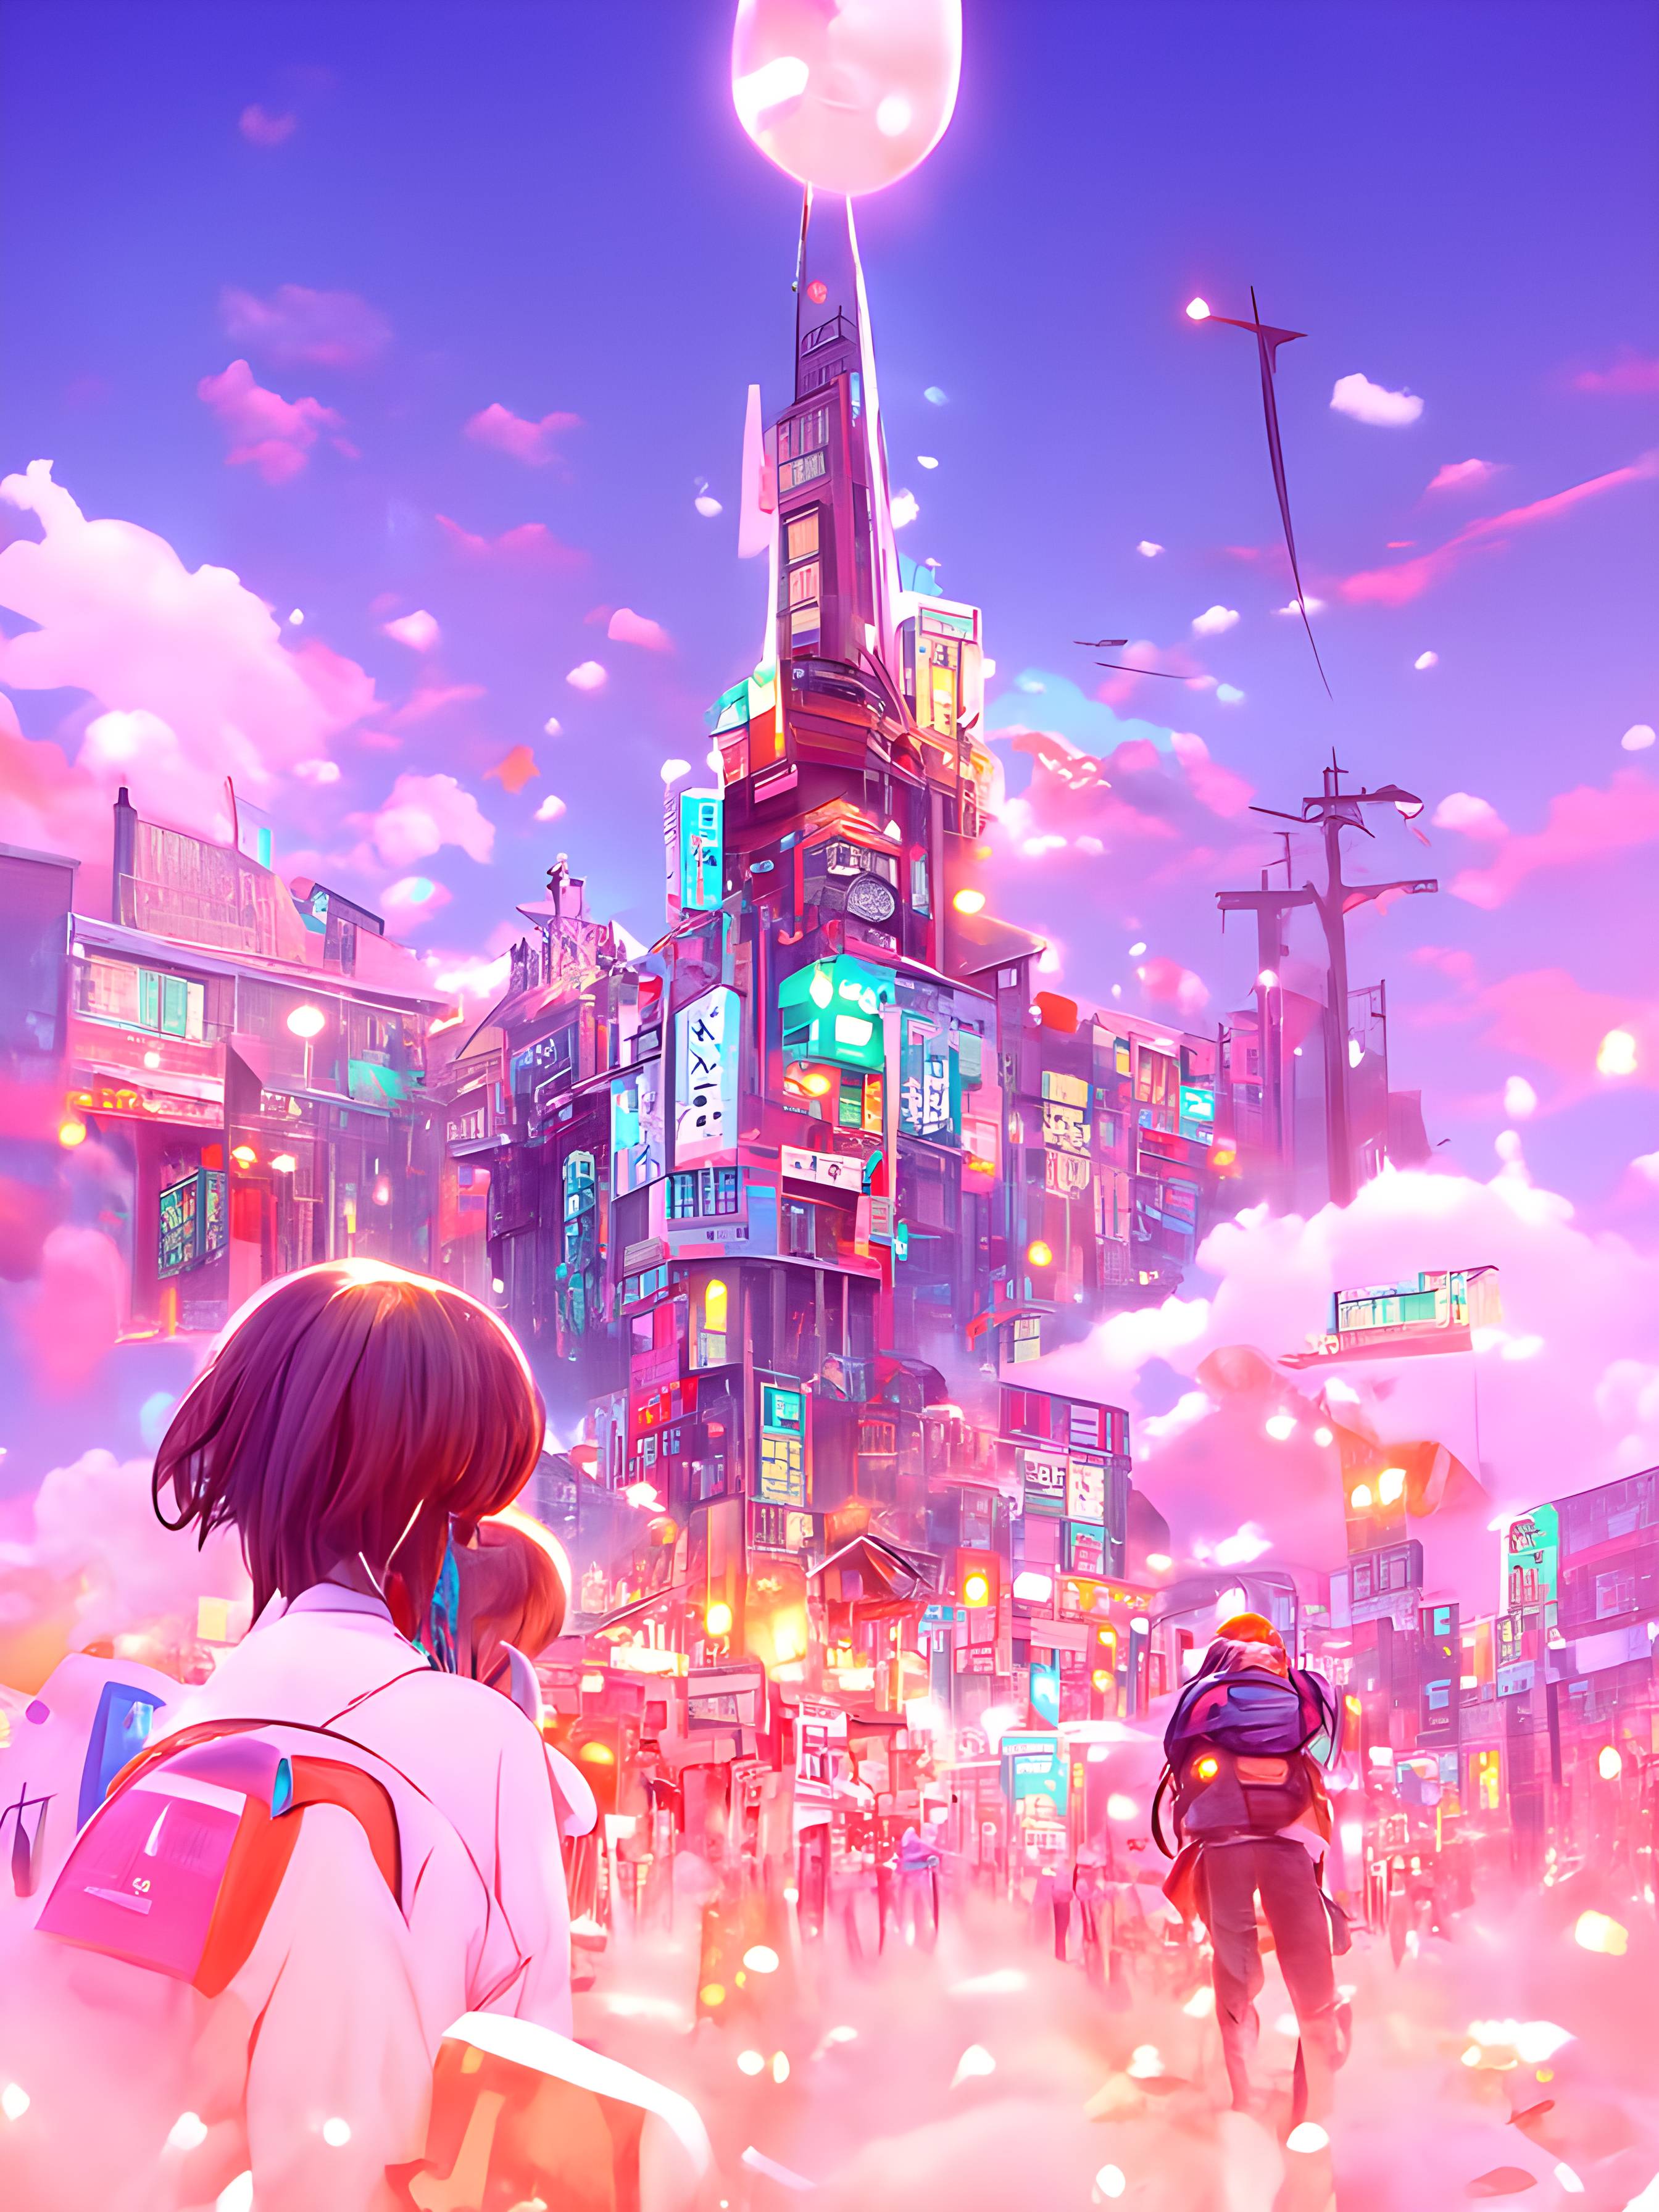
|
| Centipede Diffusion | Combination of Disco & Latent diffusion. Generates an image with Latent Diffusion, then feeds that into Disco Diffusion to re-make the same coherent composition but more artsy. | 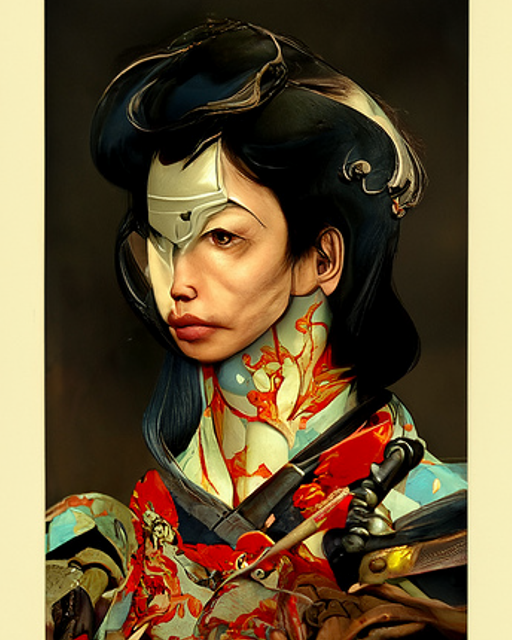
|
| Prog Rock Diffusion | A local, command-line version of Disco Diffusion, with support for breaking an image into small sections and upscaling them. | 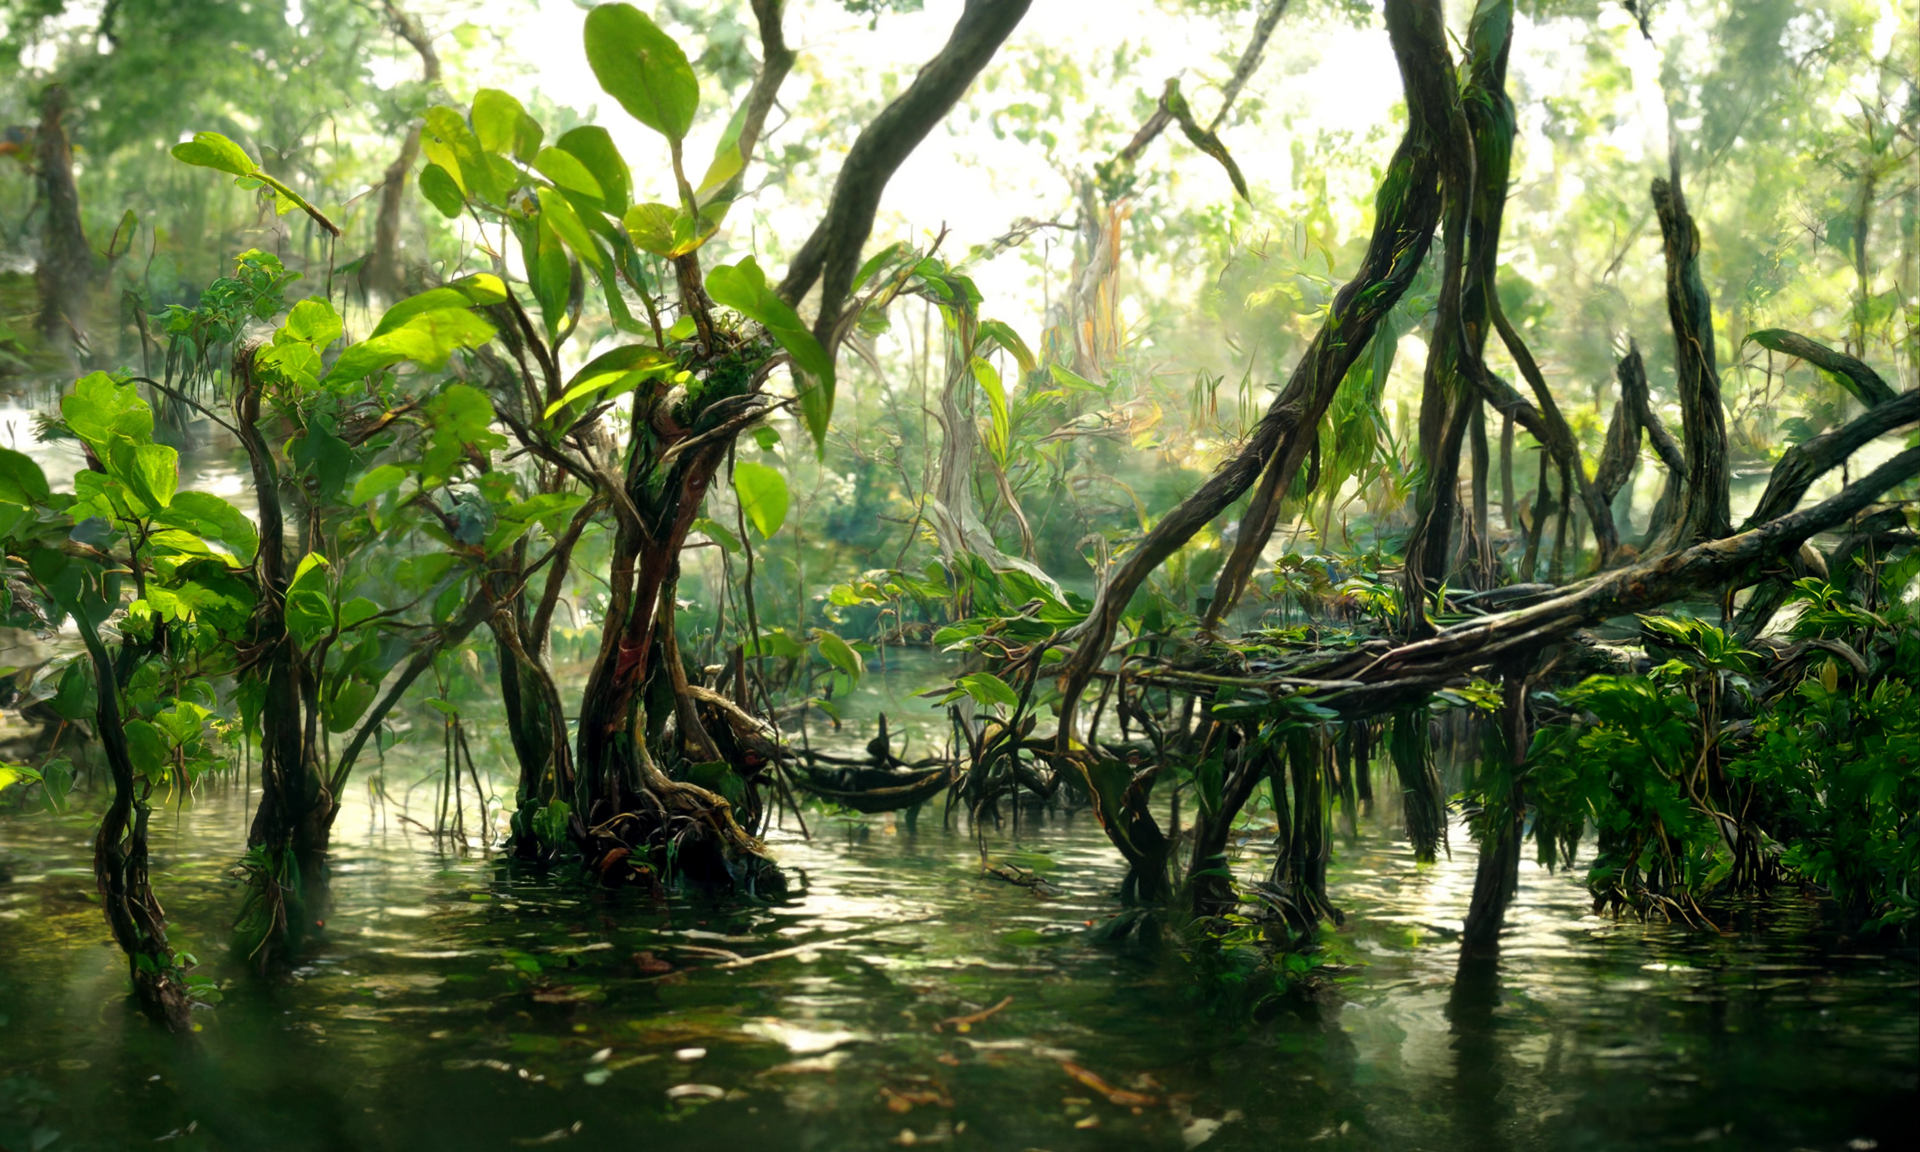
|
Generating these images is really compute-intensive, so you'll generally struggle to get anything bigger than about 1000x2000, even if you have 40GB of VRAM available. Instead, generate something smaller, then use an upscaling tool. I've used Real-ESRGAN and Topaz Gigapixel AI in the past, and can recommend them.
My Workflow
Personally, I use a custom version of Disco Diffusion (DD). You'll need to pay for Colab Pro to get more powerful GPUs - as all of my settings are based on you getting an NVIDIA T4 or P100 GPU.
In my custom notebook, I've implemented a feature that allows doing part of a DD run, then stopping and saving it. That gives me more control over the generation, by progressing it bit-by-bit, and re-running until I like how that stage went. It's a bit like MuseTree, my AI music tool.
Another benefit of splitting up the image generation is that I can start with at a small resolution with large, RAM-heavy models. Then, as we progress and have less need for the coherency of those large models, we can move to smaller models at a larger resolution. The process of upscaling mid-run isn't trivial, but that's a topic for another day.
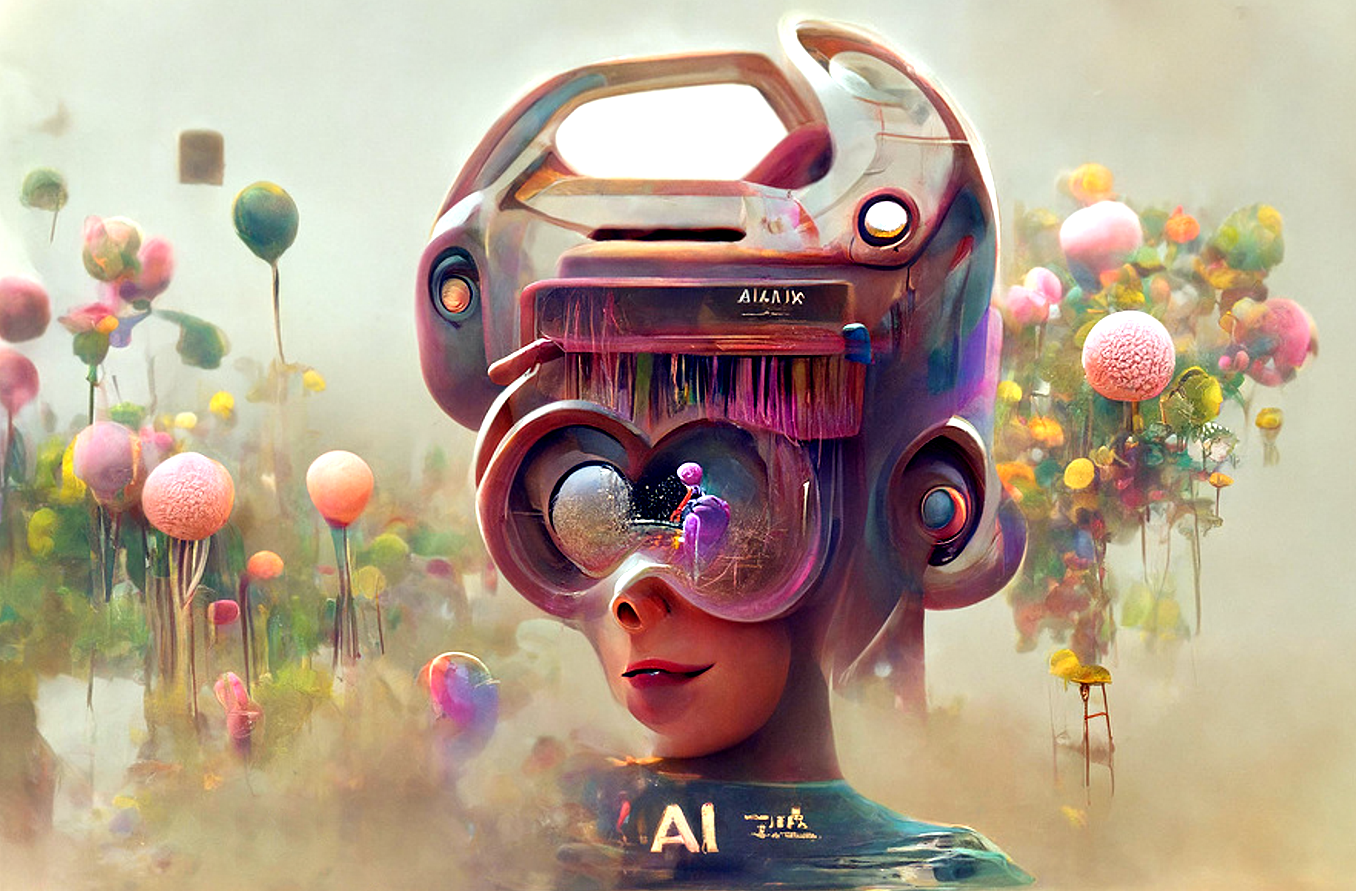
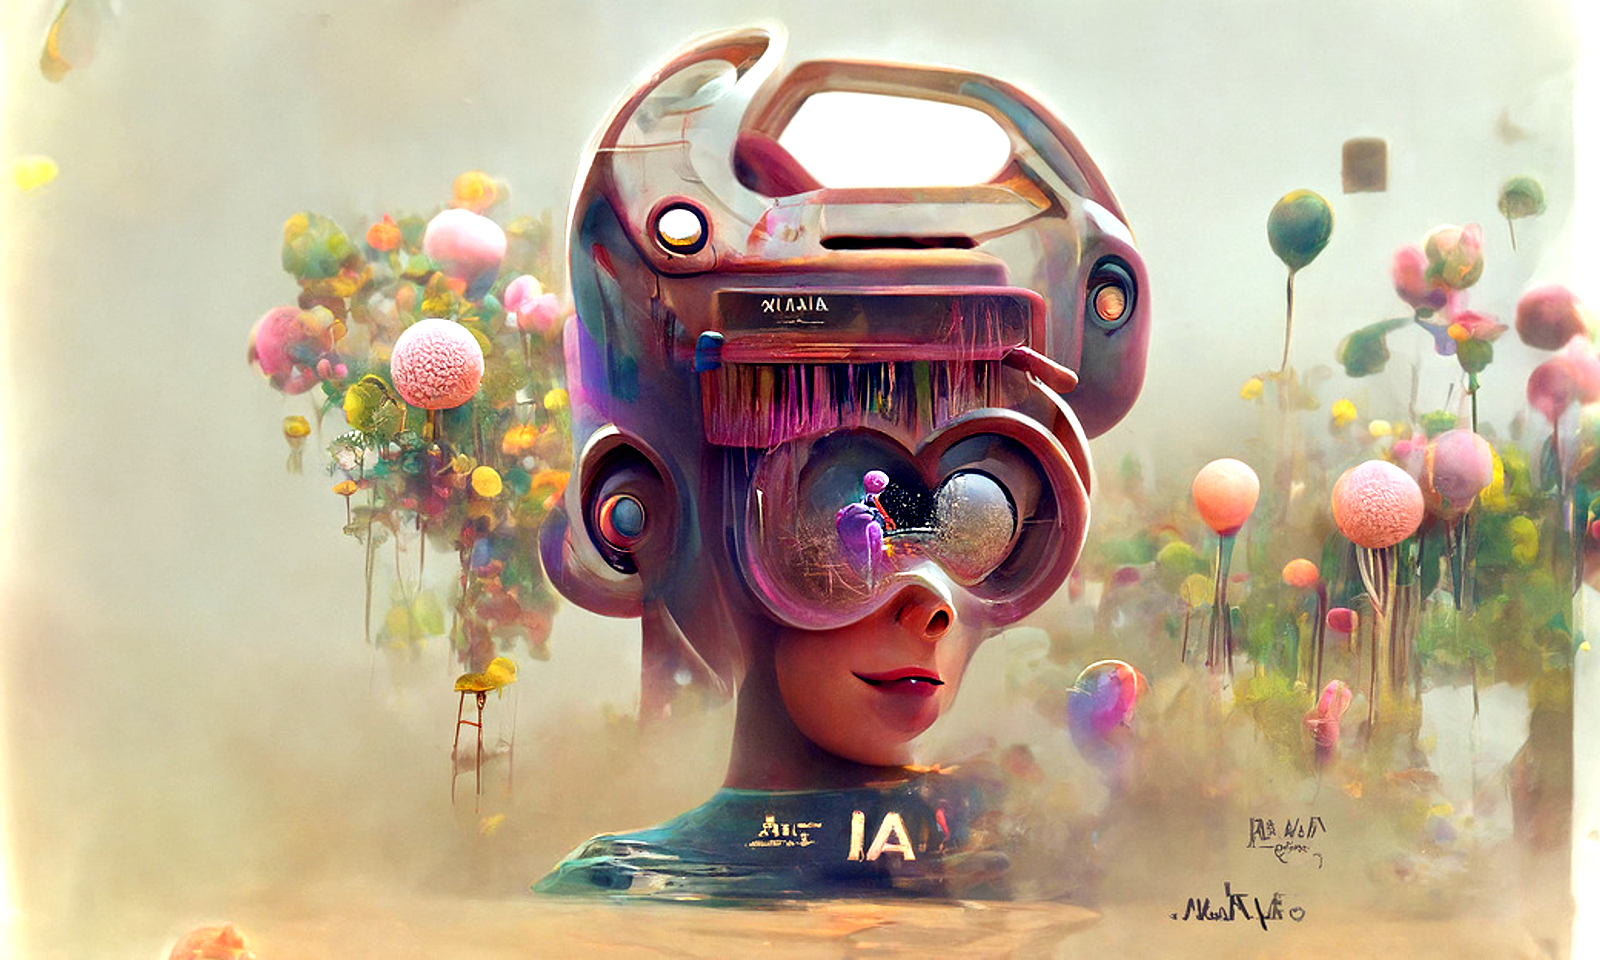
To generate the header image for this post, I split the full generation into 4 stages. I used the settings in the notebook that I linked. For reference, here's the header image again, captioned with the prompt that I used:
Step 1: Composition
The first stage is very short, only running for the first 8% of the generation. It's designed to very quickly show me the direction the image is going in, and what the overall composition will look like. Each image is 640x384px resolution, and takes about 15 minutes to generate.
As you can see, this stage has a huge amount of variability - these are all completely different images. I actually generated 16 different versions, but I've gone as high as 50 before. This stage is pretty fast, so I can just leave it running until I see something I like. I'll often run stage 2 with a few different options, just to help make the decision.
In this case, I chose the bottom-left of those 4 images. Do you see the similarity? Note that I horizontally flipped the final image, so the following examples might all look mirrored to you. Feel free to look at the back of your monitor instead, to correct for that.
Step 2: Shape
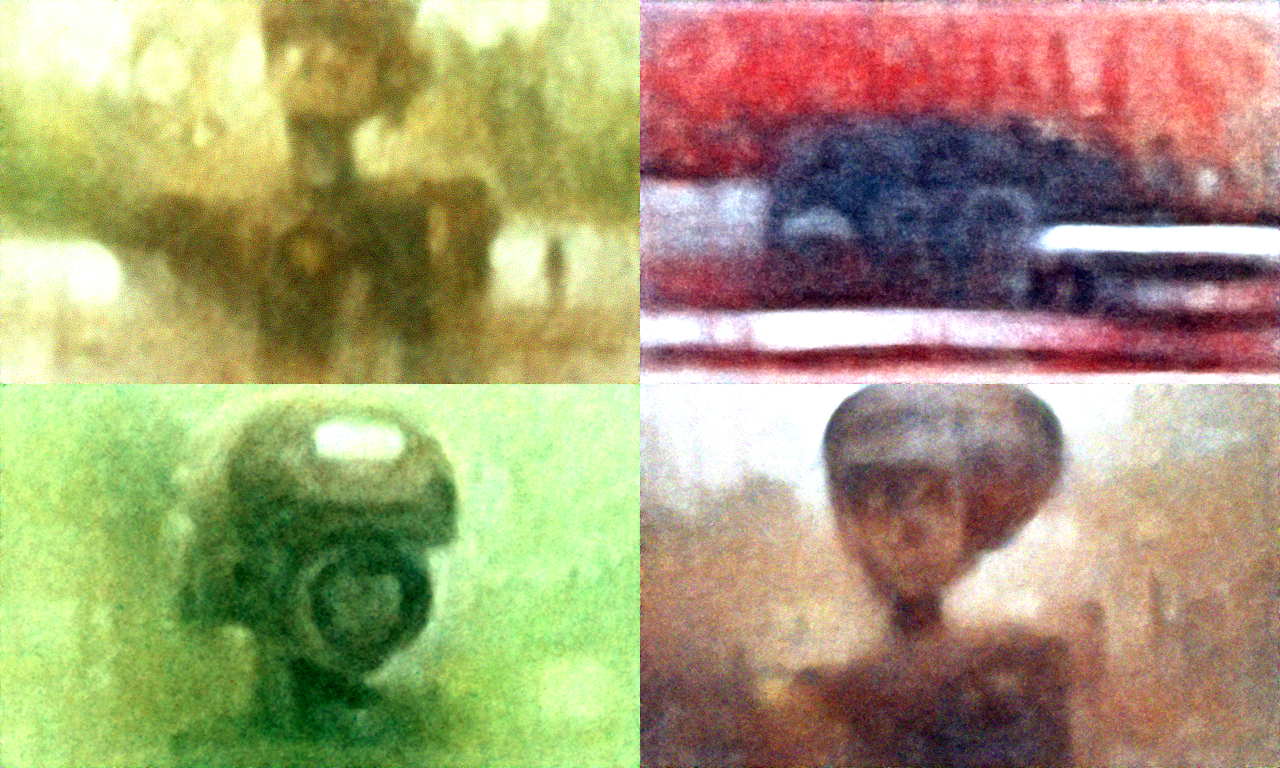
Once we have the overall composition of the image - the areas of light an dark - we move on to defining the shape of each object. This is probably the stage that has the biggest impact on coherency, as most of the options generated are a bit too abstract or deformed for my liking.
The shape stage runs from 8-40%, at the same resolution as the first stage, and takes around an hour per output. Have a look at some of the options generated:
Of the 15 options I generated, I chose the bottom right one in the grid above. It had great coherency, matched the theme of AI art that I was going for, and generally felt quite captivating. It reminds me of the Screenslaver from the Incredibles 2.
It wasn't the only one with those properties - and there were definitely others that I liked, such as the one below. It's just personal preference in the end, and I liked that one. If, when filling in the details, I couldn't get it to go in a direction I liked, I would probably come back and pick a different option at stage 2.

Step 3: Details
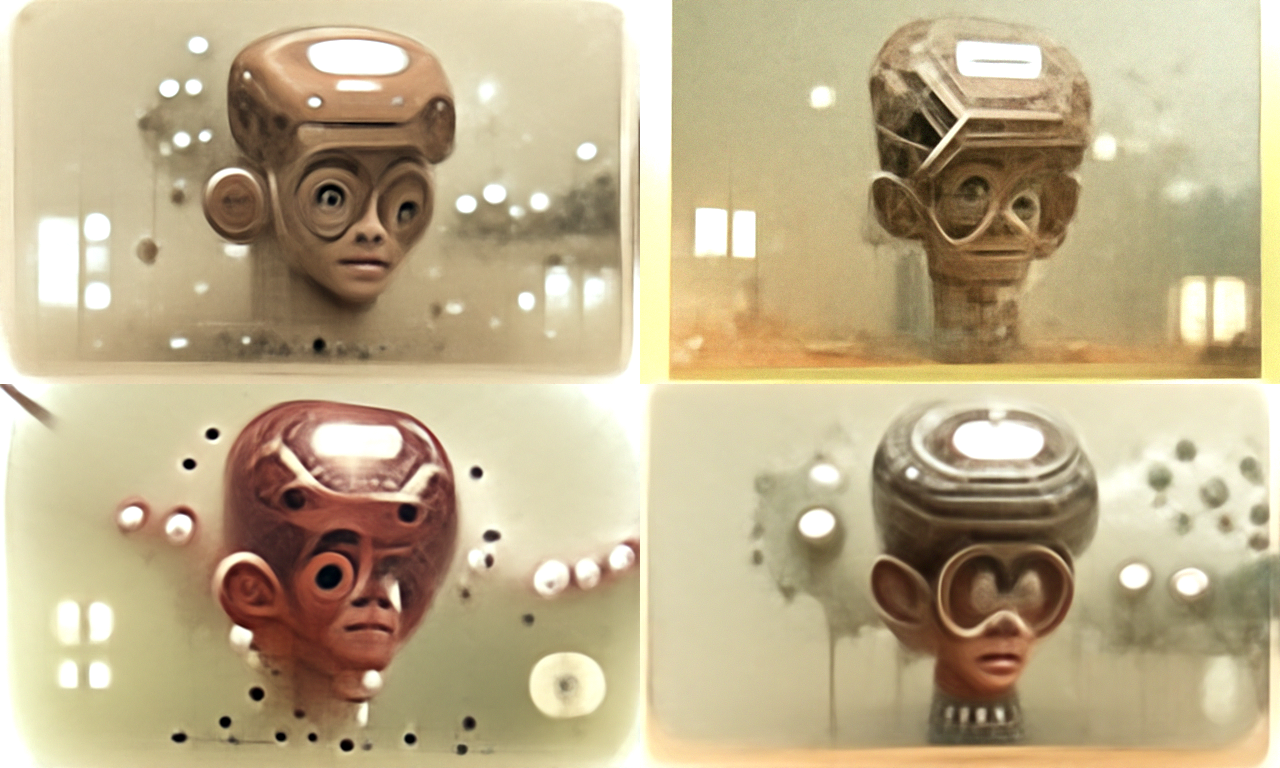
At this point, we have a good idea of what the image will look like, so we start upscaling and using less powerful models. The details stage upscales by 1.5x, to 960x576px, and runs from 40-70%. We see an explosion of colour, sharp edges, and detail in the background and objects around the image.
The details stage is usually the longest, occasionally requiring 30+ images until I find something I'm happy with. At 35 mins per image, that's a long time. For this post, it was the quickest.
The 2 images that you see above are the only two images I generated. DD usually struggles with text, so when I saw that the 2nd output had the word AI written clearly on the person's neck, I was amazed. Yes, it was backwards, but we can (did) fix that in post, and I didn't hate the way the rest of the image had come out!
Step 4: Texture
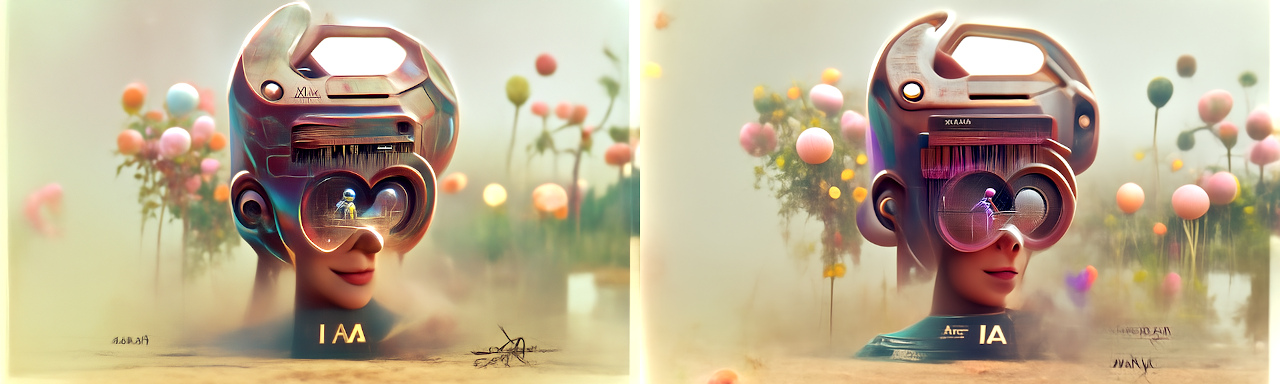
Finally, we work on the tiny details of the image, and finish upscaling it. The texture stage uses the smallest models out of any stage, and increases the reslution by 1.66x, to 1600x960px. That's 6.25x as many pixels as the first stage!
As the name suggests, this stage is all about texture. Tiny bumps on skin, roughness of materials, individual strands of hair, and fake brush strokes. I've shown a small slice of each option at full resolution, because the differences are tiny, even though this stage lasts all the way from 70-100%.

Despite taking 27 mins per run on average, this stage tends to be quite quick. Since the difference between runs are so tiny, I usually only generate a few before I'm happy with one of them. In this case - and the fact that I had to look it up is telling - I picked the middle one, out of 4 total options.
So this is the point where the AI part ends, and the human part starts. Here's the raw output from Disco Diffusion, before I started doing a little bit of manual cleanup:
Manual Cleanup
There were a few things that needed fixing in this version, before I could use it on my blog.
I flipped the image horizontally, so that the word AI would show up correctly, and started to remove the signatures in the bottom right. Since the models used by Disco Diffusion were trained on a lot of art, it's used to seeing signatures all over the place. It's trying to recreate the things it sees, so it adds signature-like black squiggles sometimes.
Occasionally, it will convert the signature into a bird, or some other object, towards the end of the run. In this case, they were still there, so I painted over them using the heal tool in GIMP.
Finally, I cropped the top and bottom of the image slightly, so that It would display better as a header image. I configured my blog to position the header image to be bottom-aligned, so you can clearly see the AI. And that's it!
Get Started
If you want to get started with making your own AI art, here are some of the things that helped me. For slightly techy people, I'd definitely recommend the EleutherAI discord server, and its art channel. They're really friendly, and some of the most knowledgeable people when it comes to AI art. It's not really for beginners though.
If you are a complete beginner, try out Disco Diffusion. You can ask questions in their Discord server, which is very active and helpful. To learn more about DD, read through Zippy's DD cheatsheet in full. It's an amazing reference guide, and will answer most of your questions.
Once you understand what most of the settings do, check out the EZ Charts document, which has a visual reference for most settings. There's also a visual reference of different artists and modifiers that you can use in prompts. The subreddit also has a load of model studies.
And you can also ask me for help!
Conclusion
I'm not very artistic, but learning about DALL·E 2 set me off down a path of creating AI art. It's been a load of fun, and my blog looks amazing now. I'm super excited about all the possibilities of this new technology, and I can't wait to see what you all do with it!